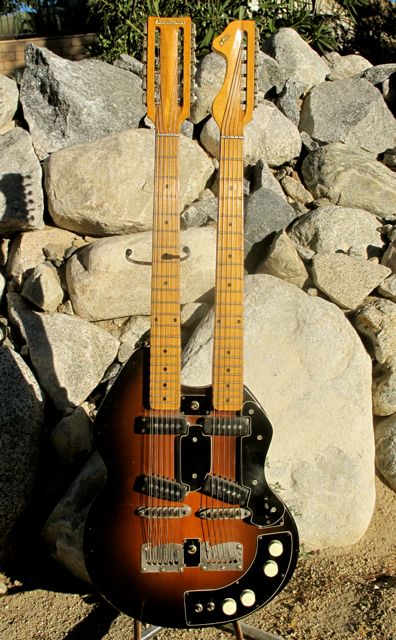
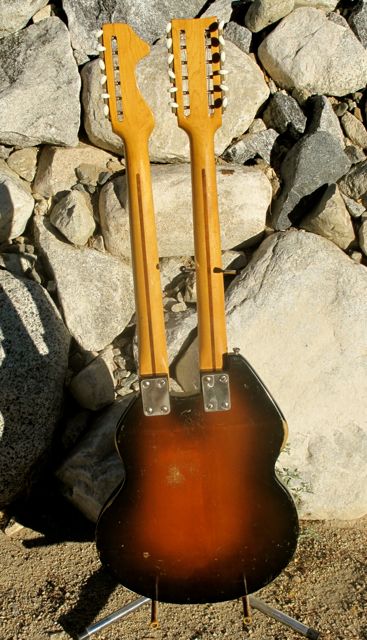
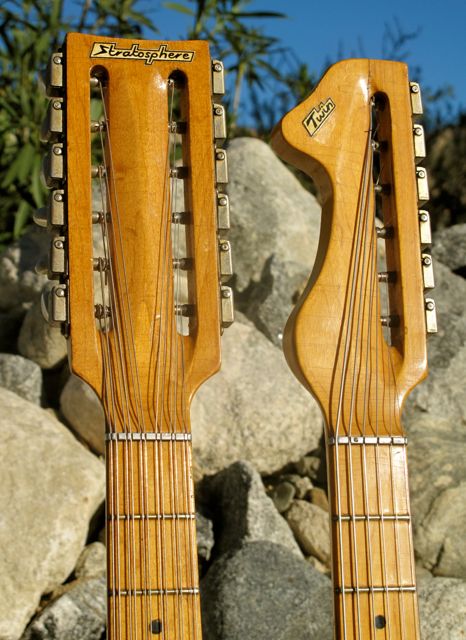
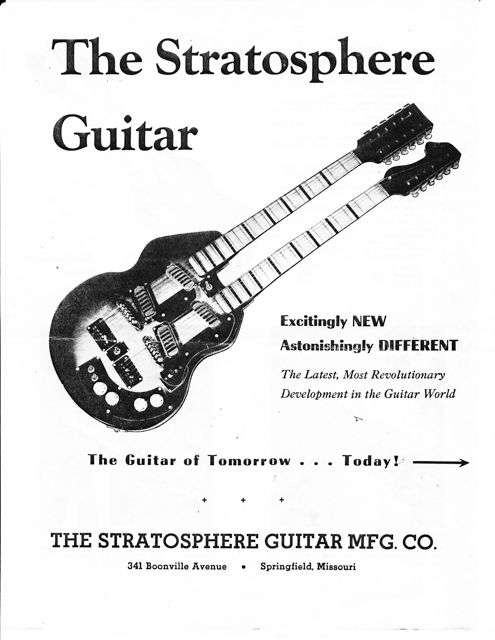
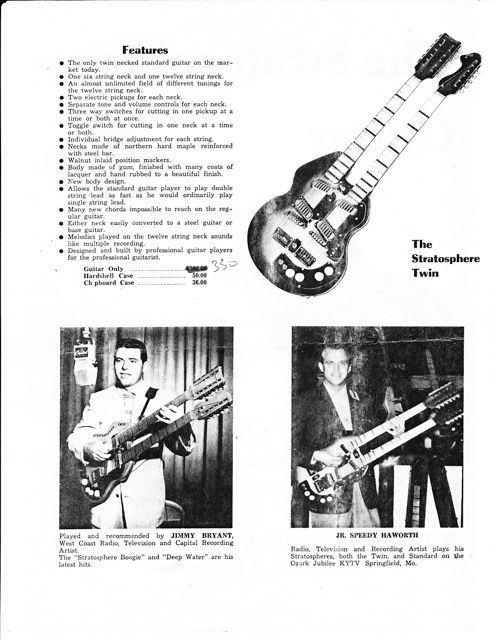
1956/57 Stratosphere Twin Guitar

For years I thought about, read about, dreamt about this strange looking guitar made famous by the late great Jimmy Bryant. I listened to “Stratosphere Boogie” over and over which he wrote specifically for playing on this guitar. I never thought I would own one, mostly because I had never seen one in person until one day in 1997. I was walking through the Long Beach swap meet, late in the day and saw it laying on the ground in it’s opened case. The owner had found this Stratosphere Guitar at an estate sale two days earlier. Not knowing anything about it, he took it to the swap meet. When I walked up, there were about four guys standing around it, none knowing what it was. (the name tags were missing) One comment was that it was probably made in Japan. Meanwhile, I was hyperventilating while telling the guy I wanted it. (I didn’t care that I needed to figure out how to come up the $$ that I didn’t have)
The Stratosphere Guitar was made for a short period between 1954-1958 by two brothers, Russ and Claude Deaver in Springfield, MO. I’m not sure how many guitars the guys made. I’ve heard different numbers but I think fewer than 200. The twelve string neck is tuned in major and minor thirds, rather than octaves which requires basically re-learning the guitar. The idea was that one person could play twin guitar licks. For a more complete history, click here. Being a small business owner myself, and a guitar player, I’ve always had a soft spot for creative small business ventures.
It took me a while to figure out the tuning. I put in a lot of hours to work it out. Then, I found the catalog with the tuning in it. Figures. The hardest part was dialing in the string gauges to make it playable.
To hear Jimmy Bryant’s completely insane Stratosphere Boogie, click here.


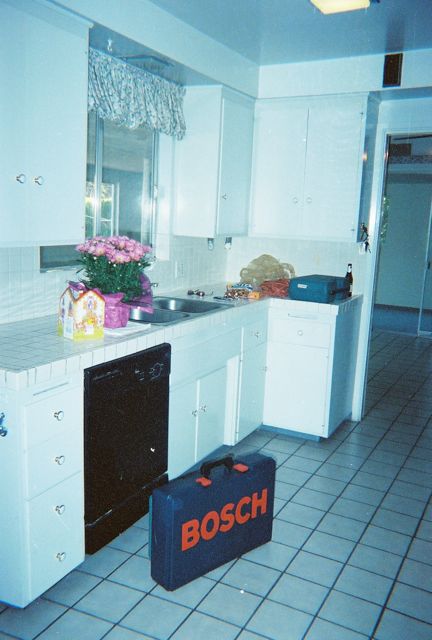
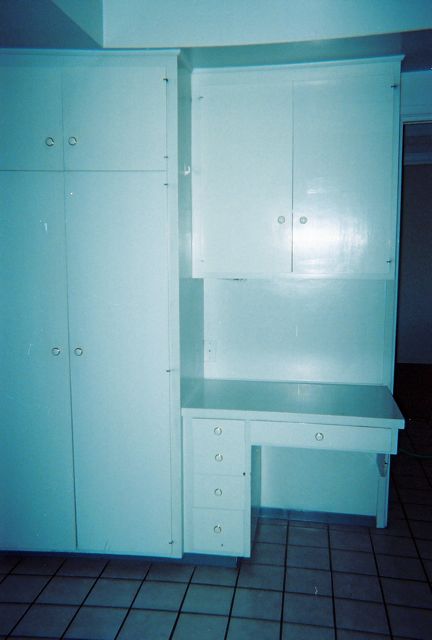
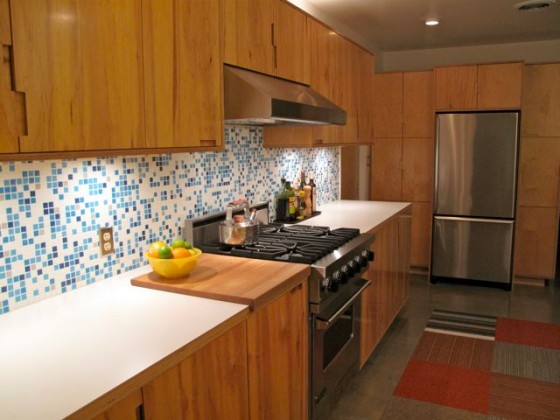
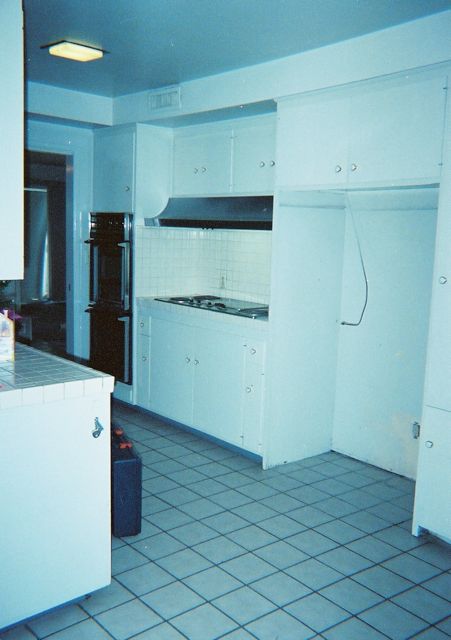
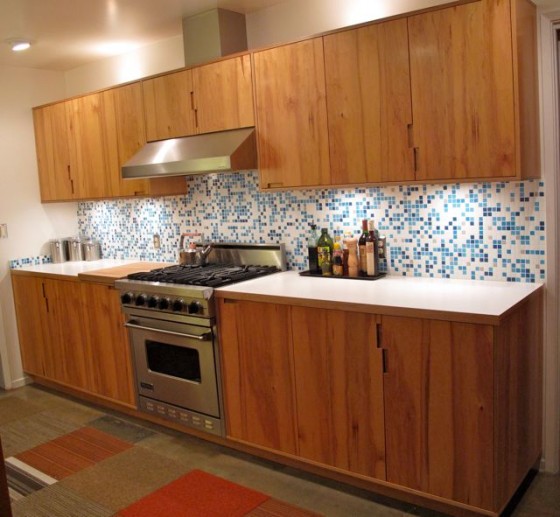
Kitchen Before and After

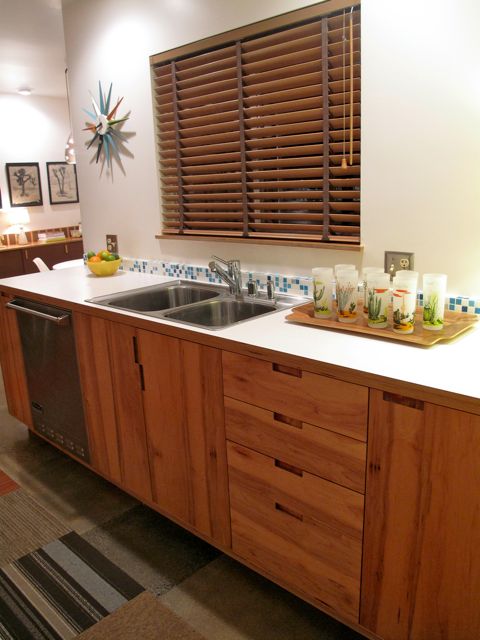
Everybody loves “before and after” photos so we thought we would share a few of our kitchen. 7487 had a very overall “grey” look and feel when we first moved in. Grey tile, grey paint, grey stained curtains. Within hours of moving in, we ripped out the tile and cabinets. We wanted to stay with the mid-century esthetic the house was meant to have, but with modern convenience. The layout of the original kitchen wasn’t bad so as we re-built, we kept the plumbing and appliances pretty much where they were originally. The simplest way to save money. We took this room down to the studs so we could do a bit of plumbing work in the walls with copper pipe in preparation of the day that our 1960 galvanized pipes decide to blow.TK put up new drywall, built the cabinets of euro-ply with formica countertops and ran gas, which already existed in the house, to the cooking area. Even with keeping the original configuration, we were able to maximize storage and countertop space in the re-build. We have been really happy with the results. The finish on the cabinets becomes even more beautiful over time as it deepens in color with age.


Lifetime Doormat

Over the years, we have replaced so many doormats that we lost count. When we moved into a house with double doors, it was an even bigger challenge to find something that looked appropriate, that might last for more than one summer. TK came up with what we call the Lifetime Doormat. Made of rectangular steel tubing that has been sliced into 3/4″ pieces and welded together, we will never shop for a doormat again! This mat does it’s job perfectly no matter what time of year. It’s great for stomping sand off your shoes throughout the year, gets the snow off in the winter and in the rare occasion that we have rain, is great to scrape the mud off before entering the house. It is heavy so instead of shaking it off like you would a normal mat, it catches the debris in between each steel ring and you just run the shop vac over it once in a while to clean it up. It could be inset into concrete or Read The Rest
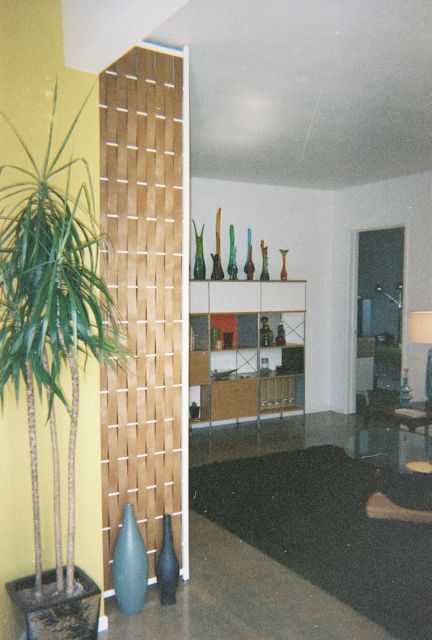
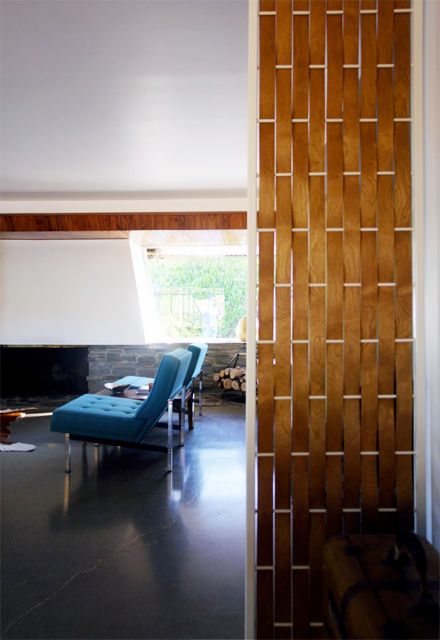
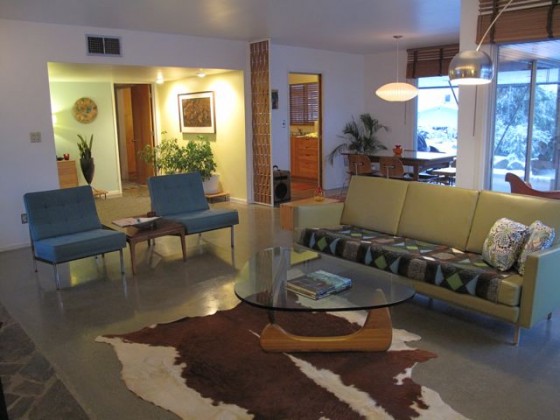
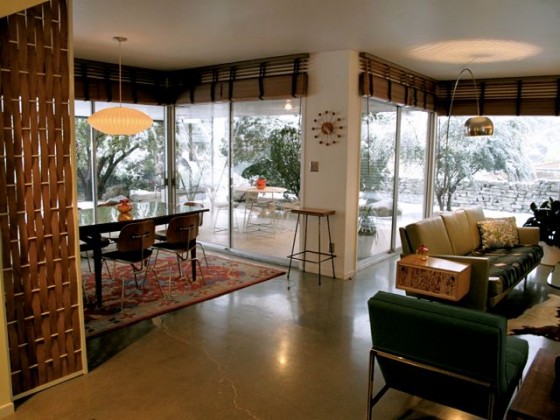
Woven Screen

When we were remodeling our first house, we decided to go all the way in the living room and get rid of one of the biggest eyesores in most homes, the big boxy television. (back in 2003 anyway) Our house was small and there was only one wall that would work to hang our new flat screen TV. Problem was, that when you walked in the front door, we didn’t want the first thing you see to be the side of it. TK came up with a solution by making a narrow screen that added interest to the room and blocked the side view of our new toy.
The rails are made of 1″ square tubing, the cross rods are 5/16″ steel rod spaced at 6″ apart, the woven wood came from an 1/8″ door skin that he had left over from a previous project, and there are threaded feet at the top and bottom to help lock it into place. He cut the door skin into 1 3/4″ strips, powder coated the frame and once put together, we had a stylish, economical solution to our problem.
The photo above and the first one below, are of the screen in it’s original location. The other photos are of it in our current home where we placed the screen to give a bit of separation in our open entrance/ living/dining area’s. The close up photo, which was taken by Morgan Satterfield of The Brick House when she came for a visit, shows the simple design, and the other photos I took on a snowy day in the desert. Even if you are a novice welder, you could try this project yourself, or if not, TK can create one for you in any size. Please contact us with questions.